Wednesday, January 12, 2011

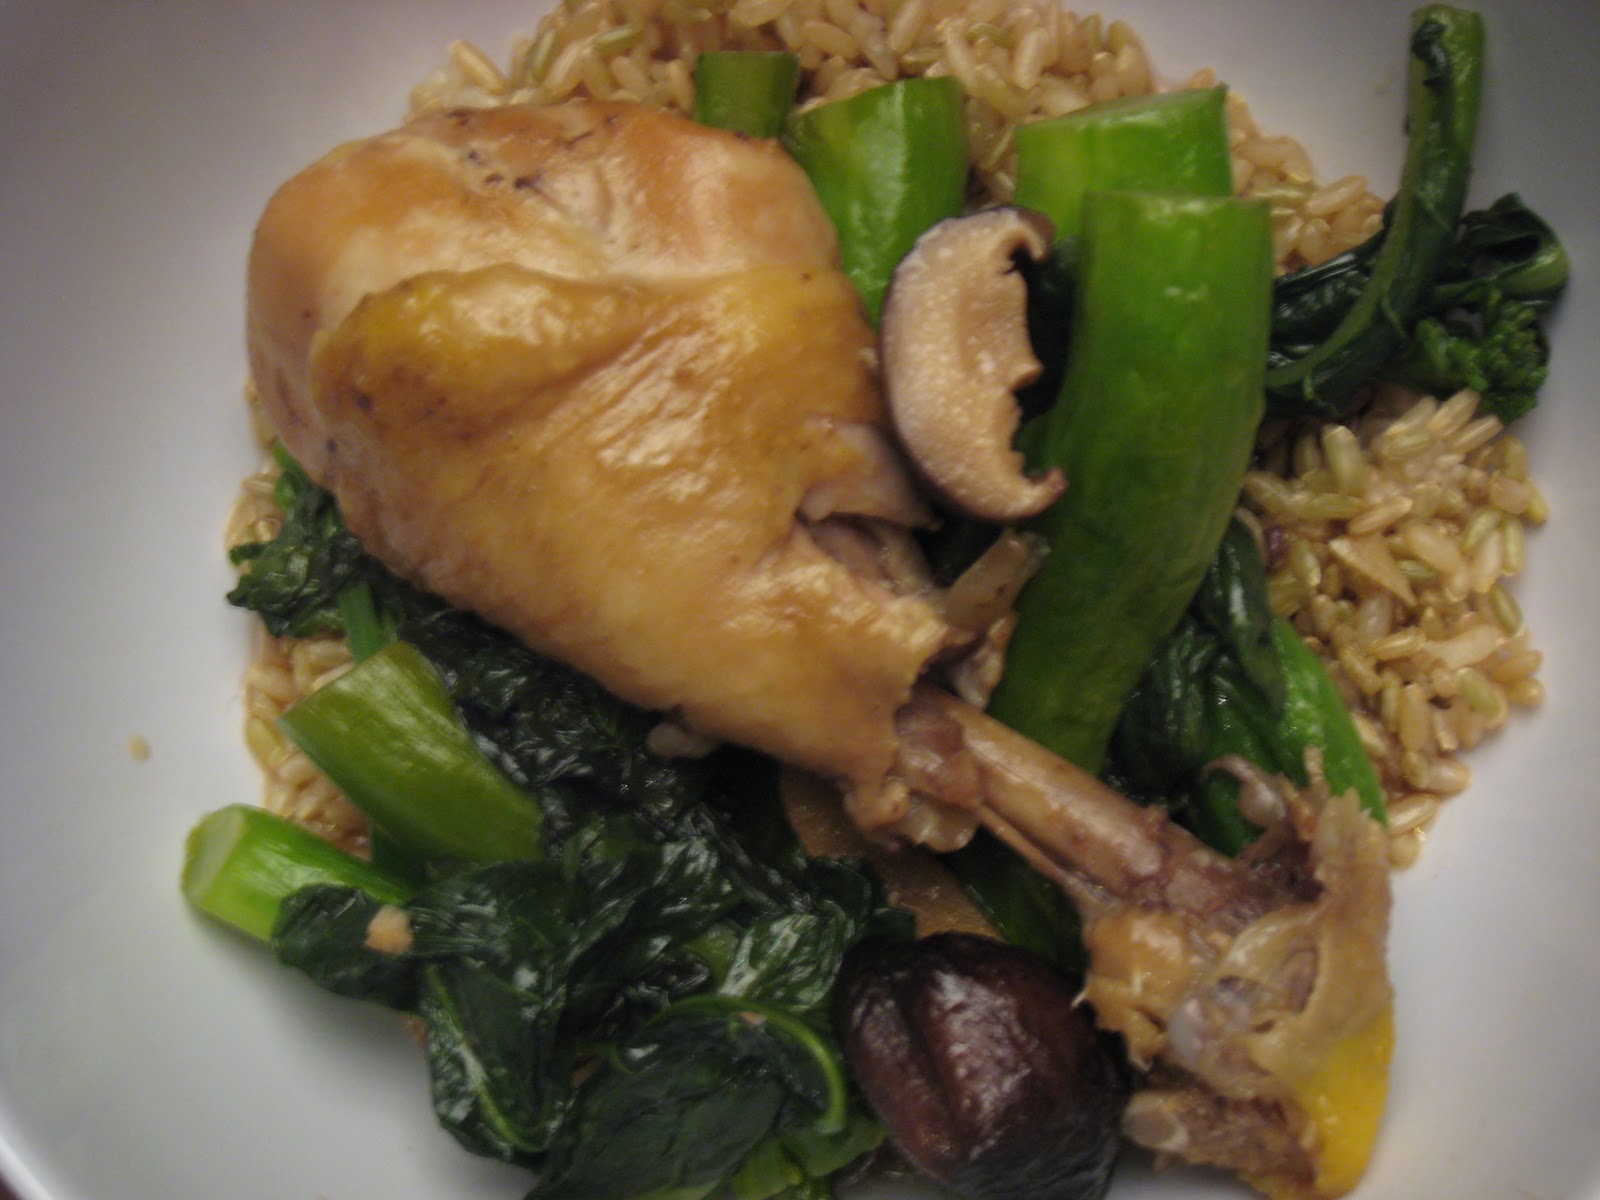
Chicken with Mushrooms in Oyster Sauce

A friend gave me Nina Simonds' A Spoonful of Ginger back around 2003, and I go to it when I want an Asian recipe that is simple and comforting.  The book is based on an Asian philosophy of food as health-giving, balancing yin and yang.  I'm not sure how much I buy into that philosophy, but I'll admit that there is something about these recipes that makes me happy.

This recipe is probably my favorite in the book because my version has very little hands on time, making it workable for a weeknight. I've cut out a bunch of steps including marinating and roasting the chicken before simmering it.  This time I made it true to the original recipe, but I didn't think it made any difference in the flavor. It seems like a waste to heat your oven all the way up to 475 degrees just to pre-roast the chicken  for 15 minutes.  It looks like this cookbook is going to be re-released this April, and the pre-order price is only about $10! I wonder if there will be new recipes!

Chicken and Mushrooms in Oyster Sauce
adapted from Nina Simonds' A Spoonful of Ginger

3.5 to 4 pounds of dark meat chicken parts (thighs, legs, or wings)
10 dried Chinese black mushrooms

Braising Sauce
2 tablespoons soy sauce
2 tablespoons Chinese cooking wine
1 teaspoon sesame oil
1 chicken bouillon cube
3 tablespoons oyster suace
3 tablespoons rice wine or sake
1.5 teaspoons sugar
6 slices of fresh ginger
About 1 teaspoon cornstarch dissolved in 1 tablespoon of cold water

1. Place mushrooms in 1.5 cups of water and microwave for two minutes. (I use my 2-cup Pyrex measuring cup.) Steep for 10 minutes until soft. Then remove stems and cut caps into thirds.

2. Mix braising sauce together in a small bowl. Place chicken and mushrooms in a Dutch oven along with braising sauce.  Heat to boiling and then reduce to a simmer for 45 minutes.  If the sauce hasn't thickened, add add another teaspoon of cornstarch dissolved in a tablespoon of cold water.  Serve over rice and vegetable.

Yield: 6 servings
Active time: 10-15 minutes
Total time: 70 minutes

Saturday, January 8, 2011

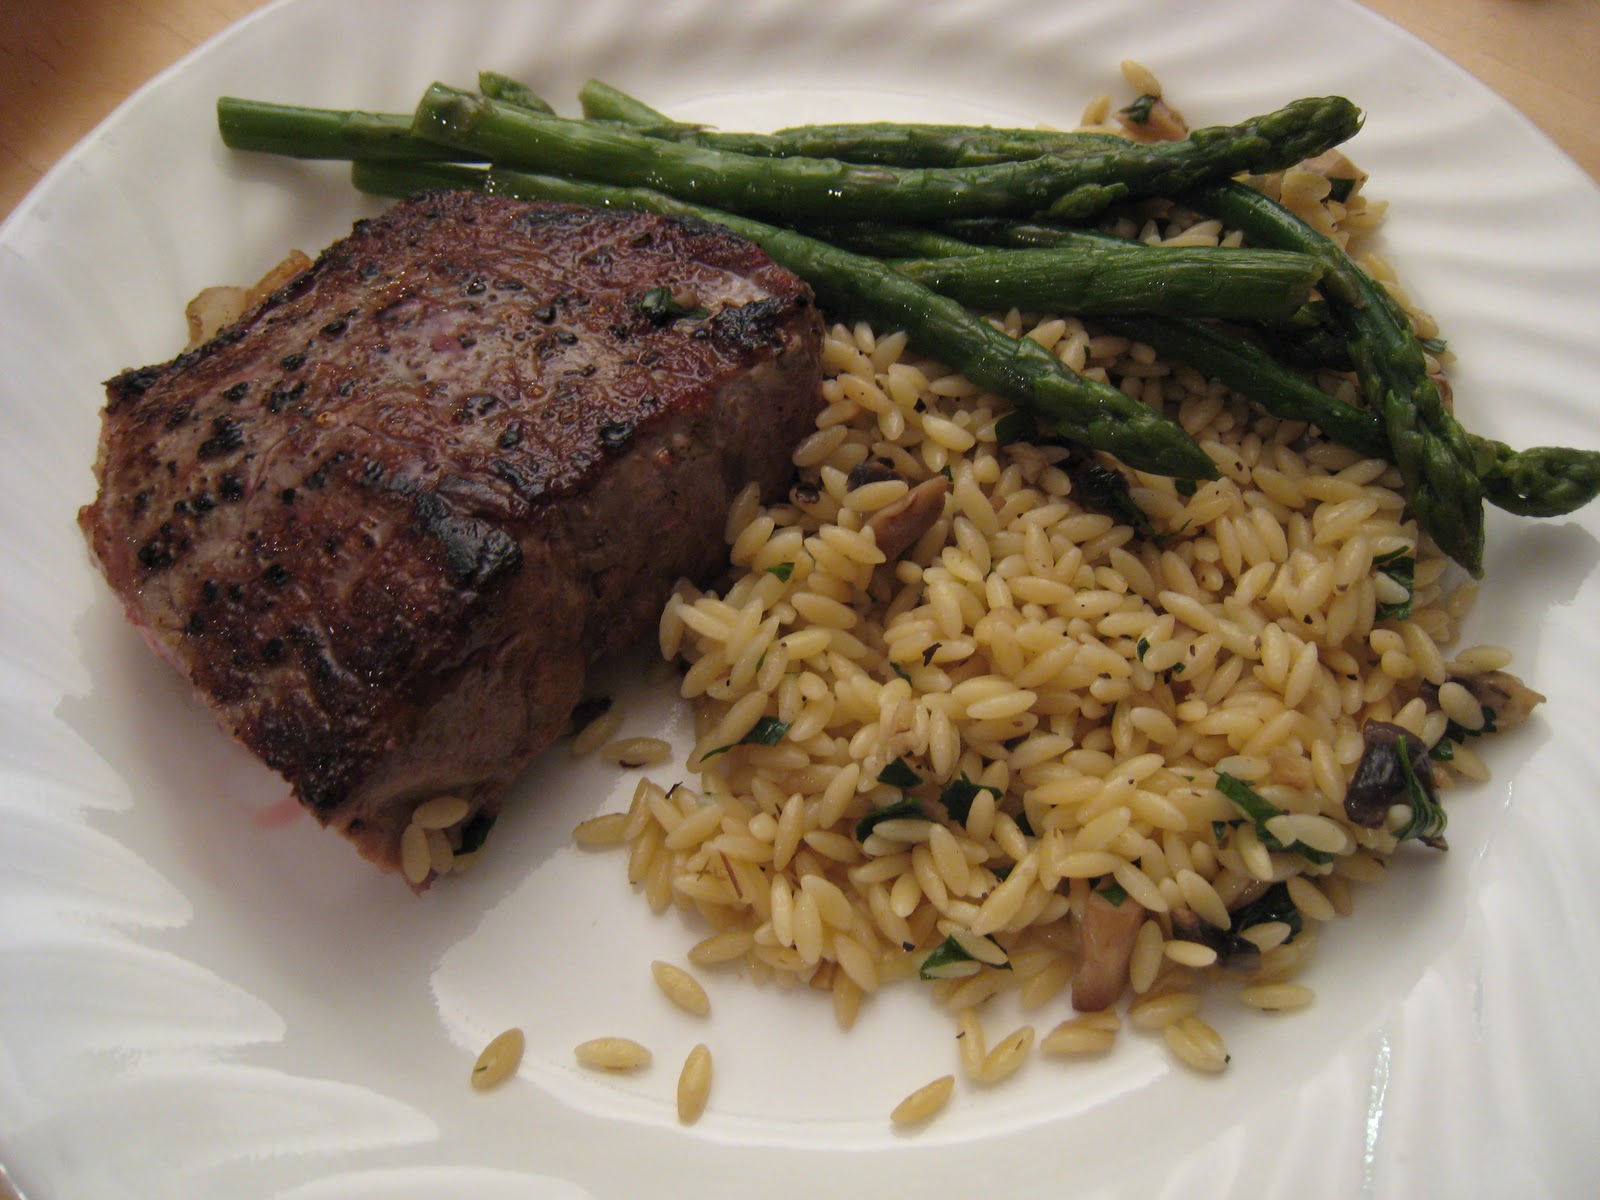
Pan-Seared Thick Cut Ribeye Steaks

It's a blessing and a curse to learn how to cook the restaurant food I love.  It's a great feeling to know that I can save myself some money and prepare food at home, but sometimes I go to a restaurant and don't want to order anything because the price mark up terrifies me!

Well, this recipe has pretty much guaranteed that I won't be ordering steaks at restaurants anymore.  I learned the basics of cooking steaks from Alton Brown's cookbook I'm Just Here for the Food. I basically patted the steak dry, liberally salted it, rubbed with oil, and seared both sides.  However, I remember Cook's Illustrated publishing a recipe that had you put the steaks in the oven first and then sear claiming that you got a crisp sear with a greater percentage of even pink meat inside, and less grey meat adjacent to the seared surface. Helen Rennie, whom I took a cooking class from once, posted about this cooking technique again recently at Beyond Salmon reminding me how much I had been wanting to try it.

After declaring that one of my new year's resolutions is to eat less meat, it's ironic that my first recipe post is about steak, but continuing to eat meat for me is about eating higher quality meat that was raised with respect in smaller quantities.  This recipe definitely honored the meat as it tasted fantastic, and together we shared a 12 oz steak for a special occasion.  Although it was a little more work than my usual steak regimen because I was taking the pan out of the oven frequently to check the steak's internal temperature, the end result was worth it.  With some practice, I'll become less nervous about the timing as what was in the recipe was pretty accurate.  The smile on my husband's face after reminding him about last week's steak is a telltale sign that this recipe is a keeper! 

Sorry that the picture doesn't really show off the inside of the steak. It looked so good that I didn't have the patience to spend time futzing with the camera. I was hungry!  Check out the wonderful picture Helen posted when she first wrote about this cooking technique. Looks delicious, right?  The original recipe had multiple pan sauces to change up the flavor, but it really didn't need it.

Pan-Seared Ribeye Steaks
adapted from Cook's Illustrated May 2007 with help from Helen Rennie at Beyond Salmon

Boneless ribeye steak (at least 1-1/2 inches thick cut into 4 to 6 ounce pieces)
Kosher salt and ground black pepper
1 tablespoon vegetable oil

1. Adjust oven rack to middle position and heat oven to 275 degrees. Pat steaks dry with paper towel. Consider tying steaks with twice make whole piece an even 1-1/2 inches thick. Season entire surface of steaks liberally with salt and pepper. Place steaks on wire rack set in rimmed baking sheet; transfer baking sheet to oven. Cook until instant-read thermometer inserted in center of steak registers 90 to 95 degrees for rare to medium-rare, 20 to 25 minutes, or 100 to 105 degrees for medium, 25 to 30 minutes.


2. Heat oil in 12-inch heavy-bottomed skillet over high heat until smoking. Place steaks in skillet and sear steaks until well-browned and crusty, about 1 1/2 to 2 minutes, lifting once halfway through to redistribute fat underneath each steak. (Reduce heat if fond begins to burn.) Using tongs, turn steaks and cook until well browned on second side, 2 to 2 1/2 minutes. Transfer all steaks to wire cooling rack and reduce heat under pan to medium. Use tongs to stand 2 steaks at a time on their sides. Holding steaks together, return to skillet and sear on all sides until browned, about 1 1/2 minutes. Repeat with any remaining steaks.


3. Transfer steaks to wire cooling rack and let rest, loosely tented with foil, for 10 minutes. Serve immediately.

Keeping the blogging in the family!

While I was trapped at my sister's house for a few extra days in the post-Christmas blizzard, we spent a lot of time cooking together and realized we get a lot of our recipes from similar sources.  I was taking pictures of her food when she started asking if I was going to start blogging about our joint effort meals.  Well, I guess she started her own blog to keep me from stealing all her recipes for mine.  Check out my sister's blog at Yum Yum for the Family.

Saturday, January 1, 2011

New Year's Food Resolution: Menu Planning!

It's the new year which means it's time for some resolutions. Besides my yearly resolution to floss more, I tried to think of what I could do to make my life better this year, and I think I found it--weekly menu planning!

I've had Jennifer Ford Berry's book Organize Now! for about a year. It's a great book, but I haven't made much progress beyond the first two chapters. The first two chapters really ask a lot because they focus on organizing your mind and then your schedule. For someone like me who has trouble saying no and somehow thinks that I work better when I have too much to do, those are hard tasks for me. Basically, the book says I need to start planning better so I don't feel so harried all the time. Since food is such an important part of my life, I think weekly menu planning will not only help me plan my time better but will help me with my other following resolutions:

1. Eat healthier. I take night classes twice a week, and without forethought, I end up eating something ridiculously fattening from the hospital cafeteria (ironic, yes?) and my husband eats take out burritos. Even if I have time to cook, I often don't have what I need in my pantry. Hopefully if I plan ahead, I'll be able to buy what I need and do some cooking the night before my class so I'll have something healthy and homemade to keep my brain awake during class.

2. Eat more vegetables, less meat. I don't think I can ever give up meat, but I've read Michael Pollan and Mark Bittman and would like to decrease the amount of meat I eat for my and the environment. However, trying to make a balanced vegetarian meal without tons of eggs and cheese is a challenge for me. I've been collecting recipes with beans and different types of grains (quinoa, farro) to try in the new year, and with some planning, I'll be able to stock the pantry with what will hopefully be new kitchen staples.

3. Spend less money. When there are too many obstacles to make dinner at home, sometimes it's just easier to get take out or go out to eat. However, my class schedule has definitely increased the number of times we eat out a week. Cooking more at home also means there will hopefully be leftovers to bring in for lunch the next day--even more cost savings! Also, if I only go grocery shopping once a week, I'll save money on gas.

So far, I did some research, and I've set up a spreadsheet that has room for main dishes and vegetables for each day of the week. I did the grocery shopping already for this week and am mostly following the plan. It's been a great way to incorporate my love for trying new dishes into the week because I can grab the ingredients at the store ahead of time rather than furiously searching through epicurious every night for a well-reviewed recipe that includes ingredients I have on hand.

Next post: I'll blog about our New Year's Eve meal. I tried out a cooking technique I've been dying to try, and the results were awesome!

Friday, December 31, 2010

More Adventures in Baking: Applesauce Spice Cake

I'm not much of a baker. I don't have the world's biggest sweet tooth, but I think it has more to do with the precision required for baking and the inability to adjust seasonings during the baking process. You don't know if you won't like the recipe until it's done and out of the oven!

Thankfully there are a bunch of web sites and blogs out there for people to comment on what's good and bad about certain recipes, often offering ideas on how to tweak to your taste. That was the case for this applesauce cake.

I started looking for apple cake recipes back when our CSA was giving us 20 apples a week, and we were struggling to keep up. However, I was surprised to find that most apple cake recipes didn't have many or sometimes any cut apples in them! I'm guessing that cooks prefer the consistent consistency of applesauce rather than wrestling with the water and sugar contents of different varieties of apples. Anyway, now that I don't have piles of apples to consume or give away, I was tempted to try one of the recipes I came across during my apple cake recipe hunt.

Based on the comments from other cooks, I decided to do away with the icing since it sounded unnecessary and a bit of a pain. I had to do a good bit of googling before figuring out some substitutions. First, I forgot to take the butter out to soften an hour before I started, but I picked up a great tip from Simply Recipes to put the butter between two sheets of wax paper and roll/beat it soft with a rolling pin. It was warm and soft in no time! The original recipe called for turbinado sugar and rum., but I didn't have either of them. Thankfully the internet quickly found light brown sugar and rum flavoring to be appropriate substitutes.

The cake isn't very sweet, but I love the spice flavors in it. I'm going to attribute that to my efforts with the nutmeg! I went out and bought whole nutmeg for the first time rather than substituting ground nutmeg from the jar. It was kind of fun to grate the nutmeg seed, but it'll probably take me a lifetime to go through the whole jar of nutmeg seeds I bought. I better start looking for more recipes that call for nutmeg!

Happy New Year to everyone!

Applesauce Spice Cake
adapted from Fernando's Hideway in Grenadines via Gourmet Magazine via epicurious

1-1/2 cups all-purpose flour
1 teaspoon baking soda
2 teaspoons ground cinnamon
1 teaspoon freshly grated nutmeg
1/4 teaspoon ground cloves
1/2 teaspoon ground ginger
1/4 teaspoon salt
1 cup light brown sugar
1 stick (1/2 cup) unsalted butter, softened
1/2 teaspoon rum flavor
1 large egg
1 cup unsweetened applesauce
Confectioners sugar

Place oven rack in middle position and preheat oven to 350°F. Butter pan and set aside.

Whisk together flour, baking soda, spices, and salt in a bowl.

Beat together sugar, butter, and rum flavoring with an electric mixer at medium-high speed until combined well, then add egg and beat until pale and fluffy, 2 to 3 minutes with a stand mixer or 5 to 6 minutes with a handheld.

Reduce speed to low and add dry ingredients, mixing until combined well. Add applesauce and mix until combined well. Spread batter evenly in 10-inch springform pan and bake until a wooden pick or skewer comes out clean, 30 to 35 minutes.

Cool cake in pan on a rack for 10 minutes, then remove side of pan and cool completely. Sift confectioners sugar over cake before serving.

Yield: 8 to 10 servings
Active Time: 30 minutes
Total Time: 60 minutes
Thursday, December 30, 2010

Roasted Kohlrabi and Butternut Squash

Happy holidays! I had a blast cooking with my sister for Christmas. We made lots of delicious food, and when I asked for the recipes, she said, "You're not going to blog about them, are you?" Well, if she doesn't want me to start using her recipes for this blog, she better start her own blog soon!

Anyway, yesterday I made this recipe because I was trying to figure out what to do with this one poor kohlrabi stem I had left over from our fall CSA. Yes, the kohlrabi sat in my refrigerator for two months, but it looked exactly the same as the day we got it. I adapted the following recipe for my one lone kohlrabi, but the proportion of kohlrabi to butternut squash is probably pretty flexible. Anyway, it was a nice change from the usual roasted butternut squash. Kohlrabi is in the cabbage family according to wikipedia, but the stem part tasted like a sweet turnip!

Roasted Kohlrabi and Butternut Squash
adapted from Gourmet via epicurious

1 medium kohlrabi stem without leaves
2 tablespoons extra-virgin olive oil
2 teaspoons dried thyme
1/2 teaspoon kosher salt
1/2 teaspoon black pepper
2 lb butternut squash

Put oven rack just below middle position, then preheat oven to 450°F.

Trim and peel kohlrabi, then cut into 3/4-inch pieces. Toss kohlrabi with 1 tablespoon oil, 1 teaspoon thyme, 1/4 teaspoon salt, and 1/4 teaspoon pepper in a Pyrex lasagna pan. Roast for 15 minutes.

Meanwhile, peel butternut squash, then quarter lengthwise, seed, and cut into 3/4-inch pieces. Toss squash with remaining 1 tablespoon oil, 1 teaspoon thyme, 1/4 teaspoon salt, and 1/4 teaspoon pepper in same bowl.

Turn kohlrabi over and push to one side of pan. Add squash to other side of pan, stirring and turning squash over halfway through roasting, until vegetables are tender and lightly browned, about 30 minutes total (after squash is added).

Yield: 4 servings
Active time: 15 minutes
Total time: 1 hour

Monday, December 6, 2010

All-Clad Skillet: Love at First Sight?


My first All-Clad pan! It's a historic day!

For a long time, I wondered what the big fuss was all about expensive stainless steel pans. I even resisted registering for them when I got married, but after years and years of watching America's Test Kitchen, I started wanting one. That's right, Chris Kimball made me covet a pan. Now I have one thanks to an early birthday present from my mom! Thanks, Mom!

According to the Cook's Illustrated review of my All-Clad 12-inch Stainless Steel Fry Pan:
Testers praised this pan for having “everything you need in a skillet and nothing you don’t,” with enough cooking surface for sautéing eight chicken pieces without crowding; steady, controlled heat for excellent browning; and a good shape with low sides. The weight balance was outstanding; it was easy to manipulate and lift. In the durability test, it sustained the least damage, with barely visible dents.
I didn't have anything big planned for my pan's debut. Thanks to the Patriots playing Monday Night Football today there was an insane amount of traffic on the way home, so I picked up some takeout. However, I had to open up the cardboard box waiting for me. I have to say that I was dazzled when I first opened the box. Some people might use words like "dazzling" and "stunning" to describe clothes; I use them to describe new pans. Look at how the light reflects off of it!

Anyway, I stirfried some sugar snap peas in garlic and oil for my pan's first run, but I can't wait to test it out for real. I'm already impressed with how much lighter they are than my anondized aluminum pans. Maybe I'll re-run some of the tests the Cook's Illustrated crew did including sauteing onions, searing steaks, and browning chicken. Hopefully my pan will continue to dazzle me with its even heat distribution!