Showing posts with label vegetarian. Show all posts

Sunday, August 19, 2012

Pasta with Cauliflower

Whew!  That was a long break from blogging!  Well, there are lots of excuses, but let's just move on to celebrating the produce of my new home state, California!

My husband has tried for years to get me to move here with promises of great weather, but he really should have spent more time talk to the produce.  There's a great farmer's market at my hospital, and last week, I couldn't pass up a purple cauliflower!  It was so pretty!

I found a simple recipe from one of my favorite food blogs, Simply Recipes.  I made some changes to suit my husband's tastes, mostly substituting capers for anchovies and adding some toasted almonds.  With recipes like this, we're definitely making some headway in eating more vegetables and less meat, which was one of my new year's resolutions.

Pasta with Cauliflower
adapted from Simply Recipes

1 onion, chopped (about 1 1/2 cups)
2 tbsp capers Olive oil
1 cup fresh breadcrumbs
1 large head of cauliflower, core removed and discarded, florets coarsely chopped
5 cloves of garlic, minced
Salt and freshly ground black pepper
1 tbsp tomato paste
1/2 pound shaped pasta (e.g. elbow, gemelli, corkscrew, bowtie)
2 cups fresh or canned tomatoes, diced
1/4 cup chopped Italian parsley
1/2 cup freshly grated Parmesan cheese
1/2 cup slivered almonds
1 tbsp unsalted butter

  1. Put a large pot of salted water for the pasta on the stove to boil.   Cook the pasta, uncovered, in salted boiling water until 2 minutes less than the pasta package's cooking directions.  Drain the pasta from the cooking water and reserve.
  2. Heat 2 tbsps olive oil in the skillet on medium low heat. Add the onions, garlic, and capers.  Cook for 5 minutes, until the onions are soft. Remove from heat. 
  3. Add the cauliflower, stir infrequently, allowing the cauliflower edges to brown. Cook until the cauliflower florets are lightly browned, 3-5 minutes. Add salt and pepper to taste. 
  4. Dissolve tomato paste in 1/2 cup of water. Lower the heat to low. Add the tomato paste, tomatoes, onion, garlic, and capers, stir to combine well. Cook, uncovered, on low heat, until the cauliflower is tender.  
  5. Add the cooked pasta to the cauliflower mixture. Stir in about half of the parsley, breadcrumbs, and Parmesan, almonds, and butter.

Sunday, January 15, 2012

Pasta with Spinach, White Beans, and Walnuts

I'm probably not the only one who is looking to eat less meat.  It's a growing trend in America.  Last year, my efforts ended up being a lot of pasta and cheese, which doesn't seem that healthy either. So, I've been experimenting with non-meat proteins for the last few weeks.

I bought some tempeh from the grocery store the other day. I initially cubed it into a veggie stir-fry, but when I went for a taste, it had an off-putting flavor.  I couldn't pinpoint what it was, but I just didn't like it.  I crumbled all the tempeh cubes so the pieces would be smaller, and the crumbled tempeh ended up absorbing more of the sauce.  In the end, I think the dish was salvaged, but I'm not anxious to try tempeh again soon.

I did some research and decided to try cooking with nuts.  For those who know my favorite American Chinese takeout dish (chicken with cashew nuts without the cashew nuts), my cooking with nuts might seem strange, but I've had some good experience with pine nuts or chopped pecans or walnuts in salads.  I went to the internet and found this recipe on the Martha Stewart web site.  It also has beans in it, so it has even more non-meat protein.  Score!

I replaced the original recipe's arugula with spinach since that's what I had in the refrigerator.  This dish got two thumbs up form the husband, and I think it will be a staple for weeknight meals this year!

Pasta with Spinach, White Beans, and Walnuts
adapted from marthastewart.com

16 ounces gemelli or farfalle
Coarse salt and ground pepper
4 garlic cloves, thinly sliced
4 tablespoons butter
1 pound spinach
1 can (15 ounces) small white beans or cannellini beans, rinsed and drained
1/2 cup walnut pieces, toasted if desired

  1. Cook pasta in a large pot of boiling salted water until al dente. Reserve 1/2 cup pasta water; drain pasta, and set aside.
  2. Place pasta pot over medium heat. Add garlic and 1 tablespoon butter; cook, stirring, until garlic is fragrant, about 2 minutes.
  3. Add spinach to pot; toss just until wilted. Add beans, pasta, and remaining 3 tablespoons butter; season with salt and pepper. Toss, adding enough reserved water to mixture to coat pasta. Garnish with walnuts.
Yields: 4 servings
Total time: 20 to 30 minutes

Friday, September 9, 2011

Vegetable Week Continues: Turnip and Turnip Green Risotto

What to do when you pick up your weekly veggie share and you get enormous turnips with even more enormous turnip greens?  Turnip risotto!

I made turnip risotto last year, but I can't seem to find the recipe anywhere.  I scoured the internet, and I found one on epicurious that looked pretty close to the one I remembered.  Too bad I didn't have any bacon!  Well, I had some frozen turkey bacon on hand, but I didn't think rendering fat from turkey bacon would be the same.

Most of the time I don't have arborio rice handy. Once I substituted brown rice, and the risotto took forever!  However, I do usually have some sushi rice on hand, and it seems to work just as well as arborio rice.  Long-grain white rice also works but take a bit longer.

I couldn't really add both of my enormous turnips to this recipe due to the volume of the turnip greens.  If I did, it would have been turnip and turnip greens with some rice garnish!  I'll have to find another recipe to use my other turnip in.  Any suggestions???

Turnip and Turnip Green Risotto
adapted from epicurious.com

2 tbsp olive oil
1 small onion, chopped
2 medium turnips or 1 large turnip, preferably with greens, cut turnips into 1/4-inch dice and chop steps (about 3/4 pound total)
5-6 cups chicken broth
1 1/2 cups Arborio or short-grain sushi rice
1 tbsp butter
parmesan cheese, grated (optional)


  1. In a saucepan bring broth to a simmer and keep at a bare simmer. 
  2. In a 3-quart heavy saucepan heat olive oil over medium heat. Add onion and stir for about 2 minutes. Then add turnips and turnip greens and stir from another 2 minutes.
  3. Add rice to onion and turnip mixture and stir constantly for one minute. 
  4. Stir in 1 cup of broth and cook, stirring constantly and keeping at a strong simmer, until absorbed. Continue simmering and adding broth, about 1/2 cup at a time, stirring constantly and letting each addition be absorbed before adding next, until rice is tender and creamy-looking but still al dente, about 18 minutes total.
  5. Remove from heat.  Add butter and stir until melted.
  6. Garnish with parmesan cheese (optional)

Wednesday, September 7, 2011

Lentils with Broiled Eggplant

It's definitely the time in the CSA season when I am looking for some new ways to cook vegetables.  As much as I like vegetable stews and soups, I just wasn't in the mood for them tonight.  I had bookmarked a recipe from thekitchn.com a few weeks ago, and this week's vegetable share allowed me to try it out!

I've simplified some of the directions, but feel free to look at the original recipe.

Lentils with Broiled Eggplant
adapted from Yotam Ottolenghi's Plenty via thekitchn.com

2 medium eggplants
1 1/2 tbsp red wine vinegar
1 cup small dark lentils (such as Puy or Castelluccio), rinsed
3 small carrots, keep 1 whole and make 3/8-inch dice with the other two
3 celery stalks, keep 1 whole and make 3/8-inch dice with the other two
1 bay leaf
1 tsp dried thyme
1/2 white onion, chopped
3 tbsp olive oil
12 cherry tomatoes, halved
1 tsp dried parsley
1 tsp dried dill
2 tbsp sour cream or plain yogurt
salt and black pepper

  1. Pierce the eggplants with a sharp knife in a few places. Put them on a foil-lined tray and place directly under a hot broiler for 20 minutes, turning at least once. The eggplants will deflate, and their skin should burn and break.
  2. Remove the eggplants from the heat, and turn the oven down to 275°F.  Cut a slit down the center of the eggplants and scoop out the flesh into a colander. Leave to drain for at least 15 minutes.  Then add 1/2 tablespoon of vinegar and 1 tablespoon olive oil to the drained eggplant.
  3. Mix chopped celery and carrots with 1 tablespoon of olive oil and season with salt and pepper.  Bake in oven for about 20 minutes until carrots just tender. 
  4. Place the lentils in a medium saucepan with whole celery stalk and carrot, bay leaf, thyme and onion.  Cover with plenty of water and bring to the boil. Simmer on a low heat for up to 20 minutes, or until the lentils are tender.  Drain lentils and discard carrot, celery, and bay leaf. Transfer the lentils to a mixing bowl. Add 1 tablespoon of red wine vinegar, 2 tablespoons of the olive oil, and salt and pepper to the lentil mixture to taste. 
  5. When cooked vegetables are done, mix them with the warm lentils, followed by parsley and dill. Taste and adjust the seasoning. Spoon the lentils onto serving plates. Pile some eggplant in the center of each portion and top it with a dollop of sour cream or yogurt.
Yields: 4 servings
Active and total time: about an hour

Tuesday, September 6, 2011

The Last of the Summer Vegetables: Veggie Enchiladas and Black Beans and Rice

We had a wonderful 4-day weekend in Buffalo, but I came home to a week's worth of vegetables from our CSA still to cook!  I searched the internet to figure out what I could make to consume the most number of vegetables.  Since my night classes have started again, I was hoping for a good casserole dish so that I could make something ahead of time and reheat for the rest of the week.

I ended up combining a few different enchilada recipes I found online. There are definitely easier and faster ways to make enchiladas, but my goal this week was purely consumption of maximum vegetables.  If you want to make this faster, you can use a canned enchilada sauce or a simpler enchilada sauce recipe.

Vegetable Enchiladas with Black Beans and Rice
adapted from epicurious, allrecipes, Mark Bittman's How to Cook Everything, and the back of a Goya can of black beans

Filling
1 tbsp butter
3 cups coarsely chopped zucchini and/or yellow crookneck squash
1 cup chopped onion
1 1/2 cups fresh corn kernels (about 2 ears) or frozen
1 4-ounce can diced mild green chilies
1/2 cup sour cream
1 cup ricotta cheese
2 cups shredded Monterey Jack cheese

Sauce
2 large fresh medium-hot dried chiles, cored, seeded, and minced
3 tbsps corn oil
2 large onions, chopped
4 cloves garlic, minced
2 pounds tomatoes, cored and chopped with their liquid (about 3 cups, can also use canned)
1 cup water or chicken broth
1 tbsp sugar
Salt and freshly ground black pepper
3 tbsps freshly squeezed lime juice

Black beans and rice
2 tbsps olive oil
1 green pepper, chopped
1 onion, chopped
2 cloves garlic, minced
1 15.5-ounce can of black beans (undrained)
1 tsp chile powder
1/2 tsp kosher salt
1 tsp oregano
3/4 cup water or chicken broth
cooked rice

10 six-inch corn tortillas


  1. Preheat oven to 375°F.
  2. Make filling.  Melt 1 tablespoon butter in heavy large skillet over medium-high heat. Add zucchini and onion and sauté until vegetables are just tender, about 4 minutes. Mix in corn, canned chilies.  Remove filling from heat into bowl.  Stir in sour cream, ricotta cheese, and 1 cup Monterey Jack cheese.  Set aside.
  3. Make enchilada sauce.  Put oil in medium saucepan or deep skillet over medium-high heat.  When hot, add chiles, onions, and garlic.  Stir occasionally until onions soften, about 5 minutes.  Add tomatoes, sugar, water or chicken broth, salt, and pepper.  Cook for about 20 minutes.  Stir in lime juice.  Taste and adjust seasoning.  Puree in blender or food processor.
  4. Make enchiladas. Heat a skillet over medium heat.  Warm each tortilla for about 15 seconds or until flexible. (Can also microwave each for about 30 seconds in a damp paper towel). Place about 1/4 cup of filling in each tortilla.  Roll up, and place seam side down in a 9x13 inch baking dish. Pour enchilada sauce over the top, and sprinkle with the remaining cup of Monterey Jack.  Place pan into oven and cook for 30 to 40 minutes or until cheese begins browning.
  5. Make black beans and rice. Heat oil in medium saucepan or skillet over medium heat.  Add onion, pepper, and garlic.  Cook until tender, about 5 minutes.  Stir in remaining ingredients and bring to a boil.  Reduce heat and simmer for 10 minutes.  Serve over rice.


Yields: 10 enchiladas
Total time: about 2 hours
Active time: about an hour

Sunday, January 23, 2011

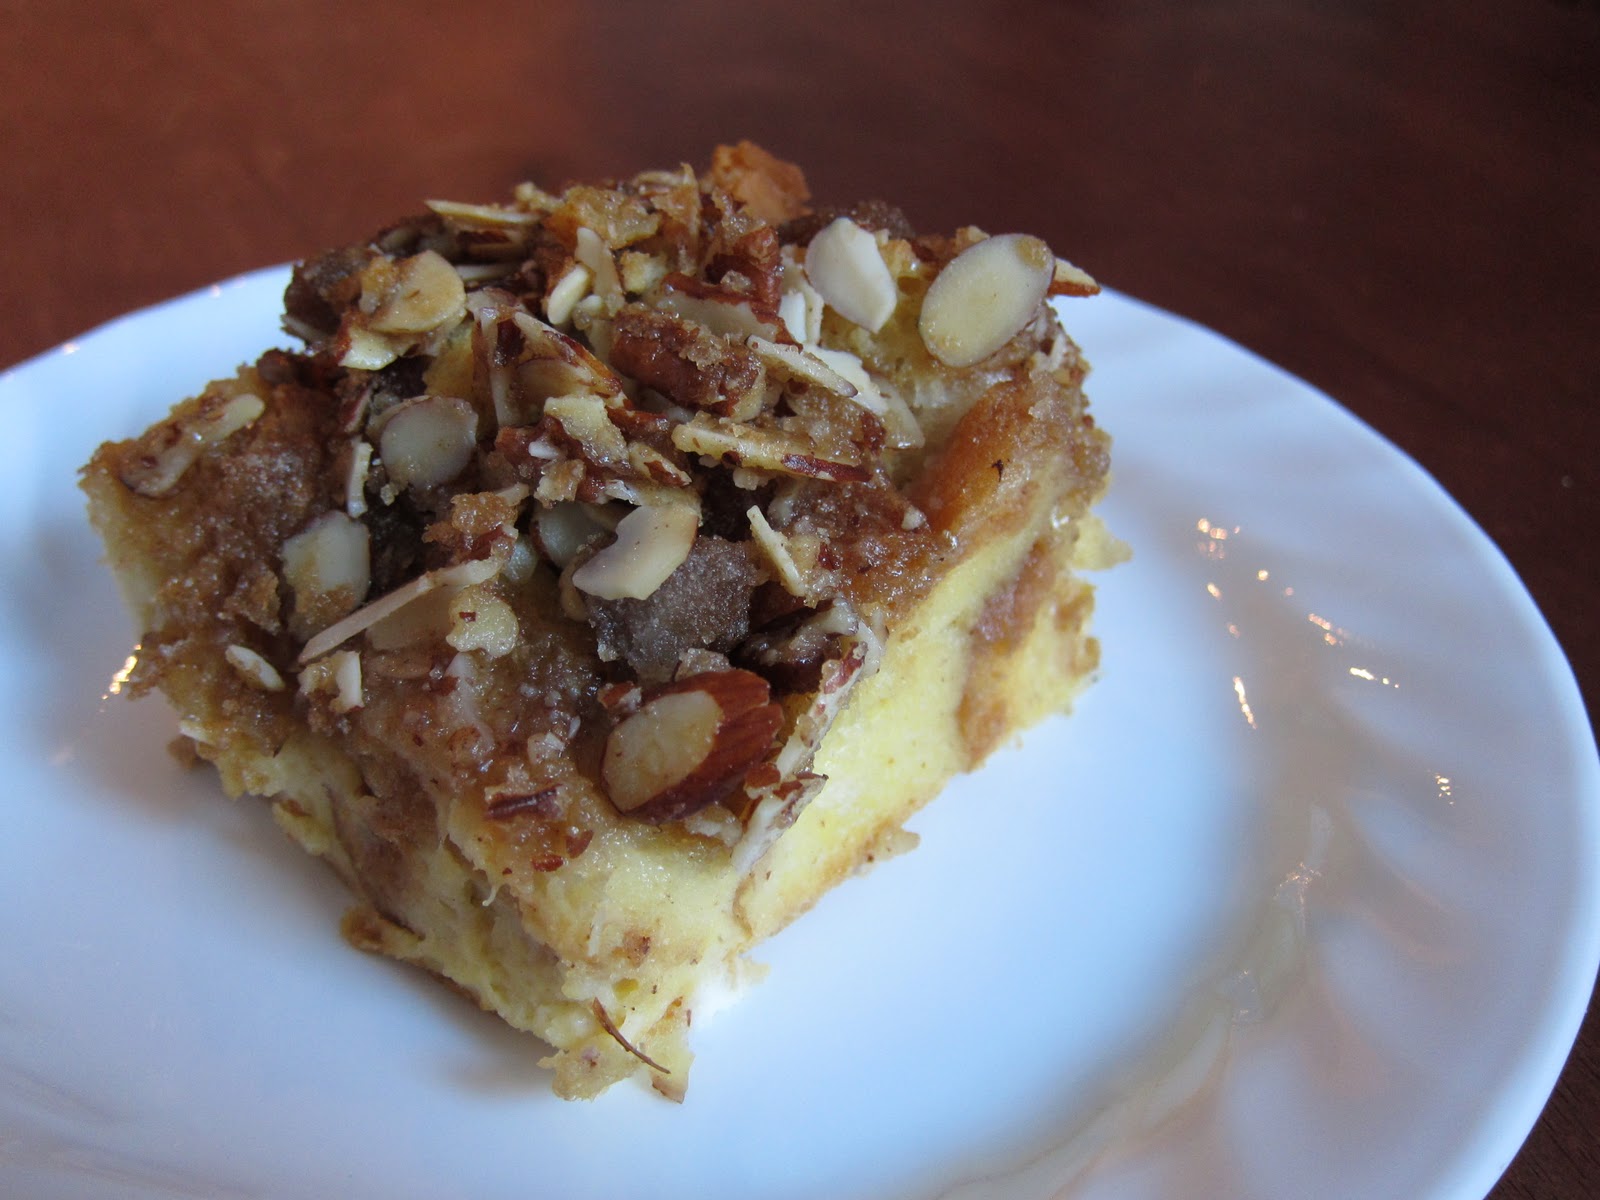
Easy Sunday Brunch: French Toast Casserole!

My husband and I had brunch with our friends Sarah and Jack a few weeks ago, and they introduced us to the fabulous idea of French toast casserole.  It has all the yumminess of French toast without all the work of frying the individual pieces of eggy toast.  

There were a bunch of French toast casserole recipes on the internet, but most of them sounded like glorified bread pudding.  As usual, Cook's Illustrated to the rescue!  This recipe has the bread soaked overnight in eggs, milk, and cream just like regular French toast, and then the topping makes the outside sweet and crunchy. No syrup necessary!

French Toast Casserole

Casserole
1 loaf (16-ounce) supermarket French or Italian bread , torn into 1-inch pieces
1 tablespoon unsalted butter , softened
8 large eggs
2 1/2 cups whole milk
1 1/2 cups heavy cream
1 tablespoon granulated sugar
2 teaspoons vanilla extract
1 teaspoon ground cinnamon
1 teaspoon ground nutmeg
Topping
8 tablespoons (1 stick) unsalted butter , softened
1 1/3 cups packed (9 1/3 ounces) light brown sugar
3 tablespoons light corn syrup
1 cup pecans, chopped coarse
1 cup slivered almonds

1.  Heat the oven to 325 degrees. Spread the bread out over 2 baking sheets and bake until dry and light golden brown, about 25 minutes, switching and rotating the baking sheets halfway through the baking time. Let the bread cool completely.

2. Coat a 13 by 9-inch baking dish with the butter and pack the dried bread into the dish. Whisk the eggs in a large bowl until combined and then whisk in the milk, cream, granulated sugar, vanilla, cinnamon, and nutmeg. Pour the egg mixture evenly over the bread and press on the bread lightly to submerge.

3. Make the topping by first stirring the butter, brown sugar, and corn syrup together until smooth, then add nuts.

4. TO STORE: Transfer the topping to an airtight container and wrap the dish tightly with plastic wrap. Refrigerate the topping and casserole separately for at least 8 hours or up to 24 hours.

5. TO SERVE: Adjust an oven rack to the middle position and heat the oven to 350 degrees. Unwrap the casserole and sprinkle the topping evenly over the top, breaking apart any large pieces with your fingers. Place the casserole on a rimmed baking sheet and bake until puffed and golden, about 1 hour. Serve immediately.

Yields: 6 to 8 servings
Active time: 15-20 minutes
Total time: 15-20 minutes of prep, overnight soak, one hour of baking

Thursday, December 30, 2010

Roasted Kohlrabi and Butternut Squash

Happy holidays! I had a blast cooking with my sister for Christmas. We made lots of delicious food, and when I asked for the recipes, she said, "You're not going to blog about them, are you?" Well, if she doesn't want me to start using her recipes for this blog, she better start her own blog soon!

Anyway, yesterday I made this recipe because I was trying to figure out what to do with this one poor kohlrabi stem I had left over from our fall CSA. Yes, the kohlrabi sat in my refrigerator for two months, but it looked exactly the same as the day we got it. I adapted the following recipe for my one lone kohlrabi, but the proportion of kohlrabi to butternut squash is probably pretty flexible. Anyway, it was a nice change from the usual roasted butternut squash. Kohlrabi is in the cabbage family according to wikipedia, but the stem part tasted like a sweet turnip!

Roasted Kohlrabi and Butternut Squash
adapted from Gourmet via epicurious

1 medium kohlrabi stem without leaves
2 tablespoons extra-virgin olive oil
2 teaspoons dried thyme
1/2 teaspoon kosher salt
1/2 teaspoon black pepper
2 lb butternut squash

Put oven rack just below middle position, then preheat oven to 450°F.

Trim and peel kohlrabi, then cut into 3/4-inch pieces. Toss kohlrabi with 1 tablespoon oil, 1 teaspoon thyme, 1/4 teaspoon salt, and 1/4 teaspoon pepper in a Pyrex lasagna pan. Roast for 15 minutes.

Meanwhile, peel butternut squash, then quarter lengthwise, seed, and cut into 3/4-inch pieces. Toss squash with remaining 1 tablespoon oil, 1 teaspoon thyme, 1/4 teaspoon salt, and 1/4 teaspoon pepper in same bowl.

Turn kohlrabi over and push to one side of pan. Add squash to other side of pan, stirring and turning squash over halfway through roasting, until vegetables are tender and lightly browned, about 30 minutes total (after squash is added).

Yield: 4 servings
Active time: 15 minutes
Total time: 1 hour

Friday, November 26, 2010

Thanksgiving Edition: Butternut Squash Soup with Red Pepper Puree

Thanksgiving is my favorite holiday because it's just about family, friends, and food without the pressure of gift giving! I am happy to make side dishes for Thanksgiving. The pressure of making a good turkey is just too much for me.

I've made this butternut squash soup before, but for Thanksgiving dinner, I decided to actually follow all the directions. I wasn't a fan of the orange flavor, so I left the orange peel out in my final version of the recipe. The red pepper puree was a great addition, though. From reading the comments on epicurious.com, I also decided to roast the squash a bit to add a little extra flavor.

Next post: Mushroom and Leek Stuffing (as seen in picture)


Butternut Squash Soup with Red Pepper Puree

adapted from Gourmet Magazine via epicurious

For soup:
2 tablespoons olive oil
2-1/4 cups chopped onions
4 garlic cloves, minced
1 2 1/2-pound butternut squash, peeled, seeded, cut into 1-inch pieces
5 1/2 cups (or more) vegetable broth
1-1/2 teaspoons dried thyme


For puree:
1 cup coarsely chopped drained roasted red peppers from jar
1 tablespoon extra-virgin olive oil
2 garlic cloves, chopped
1/4 teaspoon dried crushed red pepper

Roast squash in toaster oven for 20 minutes at 350 degrees Fahrenheit.

Heat oil in heavy large pot over medium-high heat. Add onions; sauté until tender, about 12 minutes. Add garlic and thyme; stir 1 minute. Add squash and 5 1/2 cups broth; bring to boil. Reduce heat; cover and simmer until squash is soft, about 40 minutes.

In the meantime, place ingredients for puree in food processor and puree until smooth. Season with salt and pepper. (Can be made 1 day ahead. Cover; chill. Bring to room temperature before using.)

When squash is done, cool slightly. Working in batches, puree soup in food processor or blender until smooth. Return soup to pot. Thin soup with more broth if desired. Simmer 3 minutes. Season with salt and pepper. (Can be made 1 day ahead. Cool slightly. Cover and chill. Rewarm before serving, thinning with more broth if desired.)

Ladle soup into bowls. Swirl 1 tablespoon Roasted Red Pepper Puree into soup in each bowl.