Showing posts with label Asian. Show all posts

Saturday, December 31, 2011

E-Fu Noodles with Shiitake Mushrooms and Chives

I've been trying to figure out how to make these noodles for about 10 years, and I finally did it!

This dish is the last course of the 10-course banquet at East Ocean City, one of my favorite restaurants in Boston's Chinatown.  I love the spongy texture of the noodles.  The dish is very simple, but even after I've eaten 9 other courses, I always find room for them in my stomach.

Given the light, spongy texture, I figured that the noodles were fresh, but every package of fresh noodles from the Chinese grocery store didn't have the sponginess to soak up the sauce.  I spent years feeling discouraged.  Due to my limited Chinese, I even had trouble ordering the dish in restaurants.  However, I had the noodles at East Ocean City again on my birthday this year. They were so delicious that my determination to learn how to make them was renewed!

My sister-in-law told me that the Chinese name for the noodles is "e-fu," and I read about them online, learning that the noodles were usually sold in the dried form.  I had hoped I could just order some online and have them delivered, but alas, Amazon Grocery hasn't started selling them yet.  My friend Chris confirmed that her husband had purchased this type of noodle from our local Chinese grocery store.  None of the store employees speak English, so I thought about asking Chris's husband to come on a shopping trip with me.  However, today I went to the grocery store to see what I could find on my own.  I asked one of the employees for "E-fu? Yi mein?" in my terrible accent, and then I showed her the Chinese characters from the Wikipedia page on my phone.  Success!

I thought that I'd just use the packet of soup base that came with the noodles, but after some scrolling through Google search pages, I found a recipe for the exact dish I was looking for.  I did actually weigh the ingredients on my fabulous kitchen scale (which also helps my husband be very accurate with the postage when mailing out packages), but below I tried to estimate how much to use if you don't have a scale.

I think the dish came out as good as East Ocean City's, and I made it for less than a third of what they charged us last time!

E-Fu Noodles with Shiitake Mushrooms and Chives
adapted from tastehongkong.com

200 g dried e-fu noodles (I used 3 packages of dried noodles)
150 g garlic chives (about a bunch 1-inch in diameter), cut into 2-inch segments
10-12 dried shiitake mushrooms
2 cloves garlic, finely chopped
1/2 tsp cooking wine
1 tbsp vegetable oil

For sauce:
1 1/2 tbsp oyster sauce
2 tsp soy sauce
1/4 tsp salt (or to taste, because saltiness of oyster sauce varies)
1/2 tsp sugar
1/4 tsp sesame oil

1.  Fill stock pot or water with about 4 cups of water (enough to cover one package of dried noodles).  Add mushrooms and bring water to a boil.  Then add one package of dried noodles, blanching noodles for 30 seconds to 1 minute.  Immediately remove noodles from water. Drain in a colander and rinse with cold water.  Repeat for each package of noodles.  Remove mushrooms and let cool.  Reduce mushroom water to about 1/2 a cup.  (If you don't have time to reduce the mushroom water, just substitute a 1/2 cup of chicken broth in other steps.)  Thinly slice mushrooms.

2. Mix together sauce ingredients with 1/2 cup of reduce mushroom water.  Set aside.

3. Heat wok or large nonstick skillet on medium high heat. Sauté garlic until fragrant, and then add sliced mushrooms.  Stir-fry them until lightly brown, about half to one minute. Add chives and sprinkle wine on side of wok and give a few quick stirs until chives soften.  Remove mushroom and chive mixture to plate.

4. Pour in mixed sauce in center of wok. Bring it to a simmer, then put in noodles and mushroom and chive mixture. You need to constantly flip and turn them to avoid sticking to the wok. Stir well and until all the sauce is evenly coated to the noodles.  Serve immediately.

Time: about 30 minutes
Yields: 2 servings if main course, maybe 4 servings if side dish

Saturday, August 27, 2011

Crispy Fried Goodness: Egg Rolls!


I was craving some good, crispy egg rolls the other day, but I remember what a production making them was from watching my mom when I was little.  It was a lot easier to just watch someone make the egg rolls and then eat them!  However, since my mom wasn't here to make some for me and I didn't have any classes for a few weeks, I relished the opportunity to spend a few hours making egg rolls.

We have a deep fryer, but the husband (a.k.a. the person who has to clean up after my cooking escapades) requested that I just deep fry on the stove top instead. I agree that was easier for this recipe since the egg rolls fry up so quickly. I can't really see in the window of our deep fryer, and the egg rolls really do require frequent monitoring. It was pretty fun flipping them while they were floating in oil and seeing them get darker!

A few recipe notes:
  • If you don't have a whole afternoon to prep and cook, I would recommend making the filling the day before. It's a lot of chopping!  
  • The original recipe called for celery, but I didn't have any and didn't miss it.  
  • My mom used to serve egg rolls with a vinegar sauce, but I opted for a 50-50 mix of water and soy sauce heated in the microwave.  
  • If having a dinner party, I probably would use wonton wrappers and make mini egg rolls!

Chinese Egg Rolls
adapted from epicurious.com

2 tablespoons oyster sauce
1 tablespoon soy sauce
2 teaspoons Asian sesame oil
2 teaspoons sugar
1/2 teaspoon salt
About 4 cups peanut or vegetable oil
2 teaspoons finely chopped peeled fresh ginger
2 teaspoons finely chopped garlic
1 1/2 bunches scallions (about 10), white and pale green parts cut into 2-inch lengths, then cut lengthwise into very thin matchsticks (2 1/2 cups)
1 medium carrot, cut into very thin matchsticks (1 cup)
8 large fresh shiitake mushrooms, stems discarded and caps sliced 1/4 inch thick (3 cups)
1 lb medium shrimp in shell, peeled, deveined, and coarsely chopped
1/4 lb ground pork
1 (1-lb) package Asian egg roll or spring roll wrappers
1 large egg, lightly beaten

Make filling
  1. Stir together oyster sauce, soy sauce, sesame oil, sugar, and salt in a small bowl until sugar and salt are dissolved.
  2. Heat a dry 12-inch heavy skillet (not nonstick) over moderately high heat until hot but not smoking, then add 2 tablespoons peanut oil, swirling skillet to coat. 
  3. Stir-fry ginger, garlic, and scallions until scallions are wilted, about 1 minute. 
  4. Add carrots and mushrooms and stir-fry until vegetables are softened, 4 to 6 minutes. 
  5. Push vegetables toward edge of skillet, then add shrimp and pork to center and stir-fry until shrimp are just cooked through, 3 to 5 minutes. 
  6. Add oyster sauce mixture and stir together all ingredients in skillet until combined. 
  7. Season with salt and transfer to a large shallow bowl. 
  8. Cool, stirring occasionally, about 30 minutes.
Make egg rolls
  1. Put 1 wrapper on a work surface, arranging wrapper with a corner nearest you and keeping remaining wrappers covered with plastic wrap. 
  2. Spread a scant 1/4 cup filling horizontally across center of wrapper to form a 4-inch log. Fold bottom corner over filling, then fold in side corners. Brush top corner with egg and roll up wrapper tightly to enclose filling, sealing roll closed with top corner. Transfer roll, seam side down, to a paper-towel-lined baking sheet and loosely cover with plastic wrap. Make more egg rolls in same manner, transferring to baking sheet as formed (you may have some filling left over).
  3. Heat 1 to 2 inches of peanut oil in a wide heavy pot (at least a 4-quart pot) until it registers 350°F on an instant thermometer
  4. Fry 2 egg rolls (don't crowd pot), turning with a slotted spoon, until golden brown, 2 to 3 minutes. Transfer with slotted spoon to paper towel-lined colander and drain rolls upright 2 to 3 minutes.
  5. Fry remaining egg rolls in batches, transferring to colander.
  6. Serve immediately.
Yield: 12 to 14
Total time: About 2.5 to 3 hours

Monday, January 17, 2011

Dim Sum at Home: Shu Mai

First blog pic with our new camera!
We bought a new camera last night to replace the one that died after the soup incident.  My husband has been jabbering on about all the wonderful new features our Canon PowerShot S95 has. I'm sure the myriad of settings will come in useful eventually, but all I care about is that I don't have to take food pictures with my camera phone anymore!  Woohoo!

Anyway, I knew when I changed my blog name to incorporate dumplings as a nod to my Chinese heritage I would probably have to make some dumplings at some point.  So, this is my first stab at steamed dumplings (shu mai), which is probably one of the most popular dim sum dishes.

When I told my sister I was going to start with a Cook's Illustrated (CI) shu mai recipe, she balked.  "You're not going to use a Chinese recipe?" she asked.  Well, to be fair, I didn't have a family shu mai recipe handed down to me, and none of my current Chinese cookbooks had a recipe for shu mai.  Plus, I like that the CI team tries many different variations on a recipe to optimize flavor, and I trust that they would try to make their recipes taste as authentic as possible.

My husband and I agreed that the flavors were pretty much spot on in this CI version of shu mai. I only left out their recommendation of cilantro due to my husband's severe aversion to the herb and my feeling that it didn't quite belong in shu mai to begin with. I admire the other things the CI team did to tweak the recipe.  They used gelatin to try to recreate the succulent texture lard usually lends to the dish, and instead of MSG they used a combination of soy sauce, cooking wine, and rice vinegar to add flavor to the filling.  The pork ribs I got were pretty lean, and while my shu mai weren't dry, maybe next time I'll use some fattier pork for a juicier dumpling with better mouthfeel.

Shu Mai (Steamed Chinese Dumplings)
adapted from Cook's Illustrated September 2010

2 tablespoons soy sauce
1/2 teaspoon unflavored powdered gelatin
1 pound boneless country-style pork ribs, cut into 1-inch pieces
1/2 pound shrimp, peeled, tails removed and halved lengthwise
1/4 cup water chestnuts, chopped
3/4 ounces dried shitake mushroom caps (about 5 large or 10 small), soaked in hot water 30 minutes, squeezed dry, and cut into 1/4-inch dice
2 tablespoons cornstarch
1 tablespoon toasted sesame oil
1 tablespoon Chinese rice cooking wine (Shaoxing) or dry sherry
1 tablespoon rice vinegar
2 teaspoons sugar
2 teaspoons grated ginger
1/2 teaspoon table salt
1/2 teaspoon ground black pepper
1 package yellow, round wonton/dumpling skins
1/4 cup carrot , finely grated (optional)

1. Combine soy sauce and gelatin in small bowl. Set aside to allow gelatin to bloom, about 5 minutes.

2. Meanwhile, place half of pork in food processor and pulse until coarsely ground into approximate 1/8-inch pieces, about ten 1-second pulses; transfer to large bowl. Add shrimp and remaining pork to food processor and pulse until coarsely chopped into approximate ¼-inch pieces, about five 1-second pulses. Transfer to bowl with more finely ground pork. Stir in soy sauce mixture, water chestnuts, mushrooms, cornstarch, sesame oil, wine, vinegar, sugar, ginger, salt, and pepper.

3. Working with 6 rounds at a time, brush edges of each round lightly with water. Cover remaining rounds with wet paper towel to prevent drying out. Place heaping tablespoon of filling into center of each round. Pinch wrapper creating a fold on opposite sides of filling.  Rotate wrapper 1/2 turn and pinch wrapper again.  Make a total of 8 pinches and then squeeze sides against filling, shaping dumpling so that top of filling is exposed. Transfer to parchment-lined baking sheet, cover with damp kitchen towel, and repeat with remaining wrappers and filling. Top center of each dumpling with pinch of grated carrot, if using.

4. Cut piece of parchment paper slightly smaller than diameter of steamer basket and place in basket. Poke about 20 small holes in parchment and lightly coat with nonstick cooking spray. Place batches of dumplings on parchment liner, making sure they are not touching. Set steamer over simmering water and cook, covered, until no longer pink, 8 to 10 minutes. Serve immediately.
Yields 35 to 45 pieces
Active time: About 90 minutes (maybe I'll be faster next time)
Total time: About 100 minutes

Friday, January 14, 2011

Winter Melon Soup: The Soup That Killed a Camera

Winter melon soup before camera died =(
This food blog has had its first casualty.  While taking pictures of this soup, our camera fell into the bowl of soup.

I'm still getting used to using our mini tripod, and now I've learned my lesson about keeping an eye on electronics when close to bowls of liquids. I wonder if this has happened to any one else. A quick Google search says no.  The camera can actually still take blurry pictures but the LCD screen doesn't work anymore. *sigh*

It is a small consolation that the soup was delicious, really delicious.  I had never bought winter melon before or even seen one except in restaurant soups.  I was worried that I would get the wrong melon because there are no English labels at my local Chinese grocery and usually no one who speaks English.  Luckily, I read somewhere that winter melons are usually sold by the wedge since the whole melon can be up to 50 lbs, so I picked from the only melon wedges at the store.  Bingo! Maybe in the future I will try this vegetarian version but I thought the bits of ham and dried scallop really added different layers of flavor to the soup. Since the melon itself doesn't have much flavor by itself, it soaked up the broth flavors.

As reviewers on epicurious note, don't substitute fresh scallops for the dried scallops; it would be better to skip them if you don't have them.  Lucky for me, my mother-in-law brings gives us a bag when she visits, so I usually have some around.

I skipped the original recipe's soaking process for the dried scallops and just threw them in near the end. I was also too lazy to skim off the fat, but I probably would if company was coming.

Broth with chicken and veggies taken by camera phone
I made this soup a few days ago, and tonight I shredded the boiled chicken and added that plus some watercress to the leftover broth.  It was as yummy as the original, but the picture is not as clear since it was taken with my camera phone.  Hopefully we'll have a new camera in the next few weeks!

Winter Melon Soup
adapted from Gourmet Magazine via epicurious

For broth
1 (3- to 3 1/2-lb) whole chicken
1 bunch scallions, halved crosswise
2 oz ham steak
1 (1-inch) piece peeled fresh ginger, smashed
10 cups water
1 tablespoon salt

For soup
Dried scallops, handful
1 (2-lb) wedge winter melon
2 oz ham steak, sliced into thin matchsticks
3 scallions, thinly sliced

1. Make broth: Rinse chicken inside and out, then stuff cavity with scallions, ham, and ginger. Bring water with chicken and salt to a boil in a deep 7- to 8-quart stockpot or pasta pot, then reduce heat and cook at a bare simmer, uncovered, skimming off froth occasionally, 1 hour. Remove and discard chicken. Let stand 5 minutes. Skim off fat.

2. Cut off and discard rind from winter melon. Remove and discard seeds, then cut melon into 1/3-inch cubes (about 5 cups). Add melon and dried scallops to broth and gently simmer, uncovered, until melon is transparent, 20 to 30 minutes.

3. Stir in ham, scallions, and salt to taste just before serving.

Wednesday, January 12, 2011

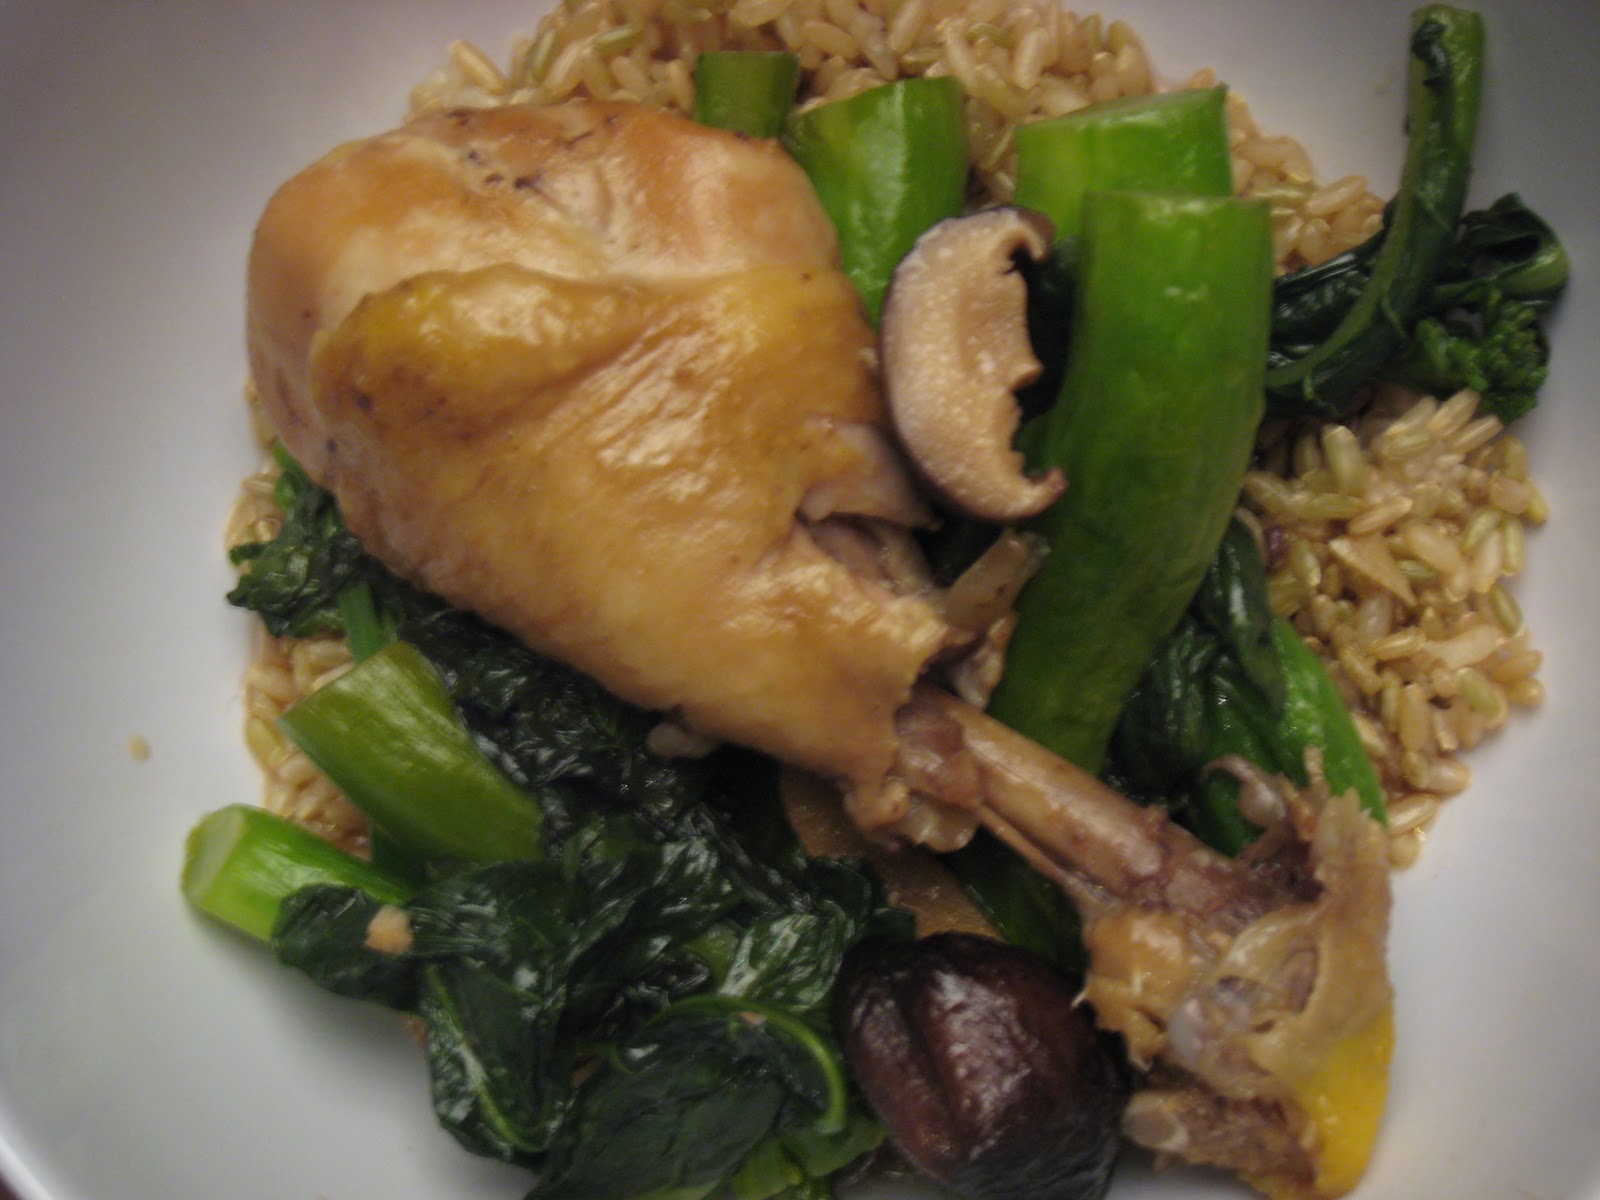
Chicken with Mushrooms in Oyster Sauce

A friend gave me Nina Simonds' A Spoonful of Ginger back around 2003, and I go to it when I want an Asian recipe that is simple and comforting.  The book is based on an Asian philosophy of food as health-giving, balancing yin and yang.  I'm not sure how much I buy into that philosophy, but I'll admit that there is something about these recipes that makes me happy.

This recipe is probably my favorite in the book because my version has very little hands on time, making it workable for a weeknight. I've cut out a bunch of steps including marinating and roasting the chicken before simmering it.  This time I made it true to the original recipe, but I didn't think it made any difference in the flavor. It seems like a waste to heat your oven all the way up to 475 degrees just to pre-roast the chicken  for 15 minutes.  It looks like this cookbook is going to be re-released this April, and the pre-order price is only about $10! I wonder if there will be new recipes!

Chicken and Mushrooms in Oyster Sauce
adapted from Nina Simonds' A Spoonful of Ginger

3.5 to 4 pounds of dark meat chicken parts (thighs, legs, or wings)
10 dried Chinese black mushrooms

Braising Sauce
2 tablespoons soy sauce
2 tablespoons Chinese cooking wine
1 teaspoon sesame oil
1 chicken bouillon cube
3 tablespoons oyster suace
3 tablespoons rice wine or sake
1.5 teaspoons sugar
6 slices of fresh ginger
About 1 teaspoon cornstarch dissolved in 1 tablespoon of cold water

1. Place mushrooms in 1.5 cups of water and microwave for two minutes. (I use my 2-cup Pyrex measuring cup.) Steep for 10 minutes until soft. Then remove stems and cut caps into thirds.

2. Mix braising sauce together in a small bowl. Place chicken and mushrooms in a Dutch oven along with braising sauce.  Heat to boiling and then reduce to a simmer for 45 minutes.  If the sauce hasn't thickened, add add another teaspoon of cornstarch dissolved in a tablespoon of cold water.  Serve over rice and vegetable.

Yield: 6 servings
Active time: 10-15 minutes
Total time: 70 minutes