Saturday, June 4, 2011

I'm back! Pan-Fried Whole Tilapia with Garlic-Ginger Sauce

Okay, it's been over three months since I've posted, but life has been busy.  I really can't remember a time when life was so busy, and yes, that includes residency!  It wasn't the hours so much but how much work bled into my home life.  I was barely cooking over the last few months, but I'm looking forward to spending a lot of time cooking this summer.  In truth, I really missed cooking, but it wasn't fun when I had to do it just to eat.  I love trying out new recipes.  Our vegetable CSA with Farmer Dave's starts soon, and I'll have to stay home and figure out what to do with all those veggies before they go bad.  I'm excited for the challenge.

Last night, I decided to venture back into the seafood section of my local Chinese grocery store.  I've been intimidated by it before.  There are no numbers or any order whatsoever to determine who is next to be served.  You just have to push to the front and get the attention of someone.  Some of the Chinese grandmothers even start grabbing fish that are laid out on the ice and throwing them into bags to hand to the guys to clean.  I've been so frustrated in the past that I've left the counter and decided to get something else for dinner instead.  Luckily, it wasn't too crowded yesterday, and I didn't have to elbow a grandma to get my fish.

Pan-Fried Whole Tilapia with Garlic-Ginger Sauce
adapted from Mark Bittman's "Crispy Sea Bass or Other Small Whole Fish with Garlic-Ginger Suace" in How to Cook Everything

vegetable oil
1 whole tilapia or similar fish, about 1.5 pounds, gilled, gutted, and scaled with head on
1 tablespoon minced garlic
1 teaspoon minced ginger
1 tablespoon soy sauce
1 teaspoon sesame oil

1. Heat a large non-stick skillet over medium-high heat.  Add vegetable oil to a depth of 1/4 for an inch and heat for 3 or 4 minutes.

2. Pat fish dry.  Put fish in oil and cook undisturbed for about 8 minutes on first side.  Turn carefully with two spatulas.

3.  While fish is cooking, heat two tablespoons of oil over medium heat in a small saucepan.  Add the garlic and ginger and cook until garlic begins to color.  Keep warm.

4.  Cook fish on second side for 8 to 10 minutes or until flesh offers little resistance to knife or chopstick.

5.  Remove fish to a plate.  Drizzle with garlic ginger sauce, soy sauce, and sesame oil.  Serve immediately.

Sunday, February 6, 2011

The Search for Crispy Skin: Stovetop Roast Chicken with Lemon Herb Sauce

I'm surprised I haven't posted about this recipe already. The first time I made this chicken was a revelation to me--even the breast meat was juicy and the skin was crispy.  Of course, there's an extra step or two more than how I would usually pan roast chicken.  You have to crisp the skin then cook the chicken through then crisp the skin again, but the results are definitely worth it!  This makes for a nice weekend dinner that's easier for me than a traditional roast chicken, mostly because I haven't mastered covering a hot chicken.

The key to this recipe as with most roasting is having a good meat thermometer.  I used to use a Polder probe thermometer that would stay in the meat with a separate screen that monitored the meat and over temperatures.  The first one I had was great, and I used it for years.  However, eventually the temperatures became more inaccurate, and the replacement I purchased didn't work.  I spent a few years avoiding roasting altogether, lusting over the Thermapen recommended by Cook's Illustrated (CI).  However, I couldn't justify spending almost $100 on a meat thermometer.  Thankfully, the good people at CI did a kitchen test of inexpensive meat thermometers last year, and I purchased the recommended CDN ProAccurate Quick-Read Thermometer for about $13.  While I miss the convenience of a probe thermometer, the CDN Quick-Read lives up to its name, registering the temperature much faster than my old Polder. While cooking at my sister's this past Christmas, I found out she didn't have a working meat thermometer, and I immediately express shipped her the CDN thermometer!

If you're interested in hearing more about whether a Thermapen is worth the money, check out my former cooking teacher's kitchen test of meat thermometers.

Stovetop Roast Chicken with Lemon Herb Sauce
adapted from Cook's Illustrated

Chicken
3 1/2 pounds bone-in, skin-on chicken parts (breasts, thighs, and drumsticks, or a mix, with breasts cut in half), trimmed of excess fat
1 tablespoon vegetable oil
1 - 1 1/4 cups low-sodium chicken broth

Lemon-Herb Sauce
1 teaspoon vegetable oil
1 small onion, minced
1 teaspoon unbleached all-purpose flour
1 tablespoon lemon juice
1 1/2 tablespoons minced fresh parsley leaves
1 tablespoon cold unsalted butter

1. Pat chicken dry and season with salt and pepper. Heat 2 teaspoons oil in 12-inch nonstick skillet over medium-high heat until shimmering. Add chicken pieces skin-side down and cook without moving until golden brown, 5 to 8 minutes.

2. Using tongs, flip chicken pieces skin-side up. Reduce heat to medium-low, add 3/4 cup broth to skillet, cover, and cook until instant-read thermometer inserted into thickest part of chicken registers 155 degrees for breasts and 170 degrees for legs and thighs, 10 to 16 minutes (smaller pieces may cook faster than larger pieces). Transfer chicken to plate, skin-side up.

3. Pour off liquid from skillet into 2-cup measuring cup and reserve. Using tongs, wipe skillet with paper towels. Add remaining teaspoon oil to skillet and heat over medium-high heat until oil is shimmering. Return chicken pieces skin-side down and cook undisturbed until skin is deep golden brown and crisp and it reaches 160 degrees for breasts and 175 degrees for legs and thighs, 4 to 7 minutes. Transfer to serving platter and tent loosely with foil. Using spoon, skim fat from reserved cooking liquid and add enough broth to measure 3/4 cup.

4. Heat teaspoon of oil in now-empty skillet over low heat. Add shallot and cook, stirring frequently, until softened, about 1 minute. Add flour and cook, stirring constantly, 30 seconds. Increase heat to medium-high, add reserved cooking liquid, and bring to simmer, scraping skillet bottom with wooden spoon to loosen browned bits. Simmer rapidly until reduced to 1/2 cup, 2 to 3 minutes. Stir in any accumulated juices from resting chicken; return to simmer and cook 30 seconds. Off heat, whisk in lemon juice, parsley, and butter; season with salt and pepper. Pour sauce around chicken and serve immediately.

Yield: 4 servings
Total time: 45 to 60 minutes, mostly active

Sunday, January 30, 2011

Instant Dinner Party Indeed! Pork Shoulder Ragu

We moved to a new apartment about six months ago, and this place was built for entertaining.  However, finding time to make food for company on top of my full-time job and part-time class schedule is not the easiest.  I've been hunting around the internet for some easy make-ahead recipes for entertaining, and I landed one day at the blog Dinner: A Love Story. Jenny and Andy post recipes that fit into a busy lifestyle, and Jenny is one of the co-authors of the book Time for Dinner and used to work at Real Simple, my favorite magazine. When they posted this recipe under the title "Instant Dinner Party", I was sold.

First, I had to get over my fear of talking to the butcher at my local store since there were only 8-pound pork shoulders out.  I love my pork, but 8 pounds was really going to be too much.  It turns out that he's really a very nice gentleman and cut down a roast to a more reasonable size for me.  On the other hand, he doesn't know how many ounces there are in a pound, but maybe he's more used to the metric system?

Anyway, we'll have to have a group of people over to try this soon because it is ridiculously easy.  Since the roast time is 3 to 4 hours but very little active cooking time is needed, this recipe is perfect for the weekend day you're home but not wanting to spend a lot of time cooking for company coming over later.  For this first time, I tried it out on just the husband and one friend.  I'm going to bet that my sister, who has been blogging up a storm, will be stealing this recipe very soon.

Pork Shoulder Ragu
adapted from Dinner: A Love Story
2 to 2 1/2-pound boneless pork shoulder roast
salt and pepper
2 tablespoons olive oil
1 small pat butter
1 large can whole tomatoes, with juice
1 cup red wine
1 tablespoon dried thyme
1 tablespoon dried oregano
1 tablespoon hot sauce (optional)
Freshly grated Parmesan (optional)

1 to 2 lbs of cooked pasta (fettuccine used in picture)

Preheat oven to 325°F. Pat roast dry and then liberally salt and pepper all sides. Add olive oil and butter to large Dutch oven and heat over medium-high until butter melts. Add pork roast to pan and brown on all sides, about 8-10 minutes in all. 

Add tomatoes, wine, thyme, oregano, and hot sauce (if using). Cover, and put in oven. Braise for 3-4 hours, turning every hour or so. Add more liquid (water, wine, or tomato sauce) so that liquid comes to at least 1/3 of the way up the pork. Meat is done when it’s practically falling apart. 

Pull pork apart with two forks. Serve over pasta with the grated Parmesan on the side.

Yields: 4 to 6 servings
Total time: About 4 to 4.5 hours
Active time: 30 minutes or less

Sunday, January 23, 2011

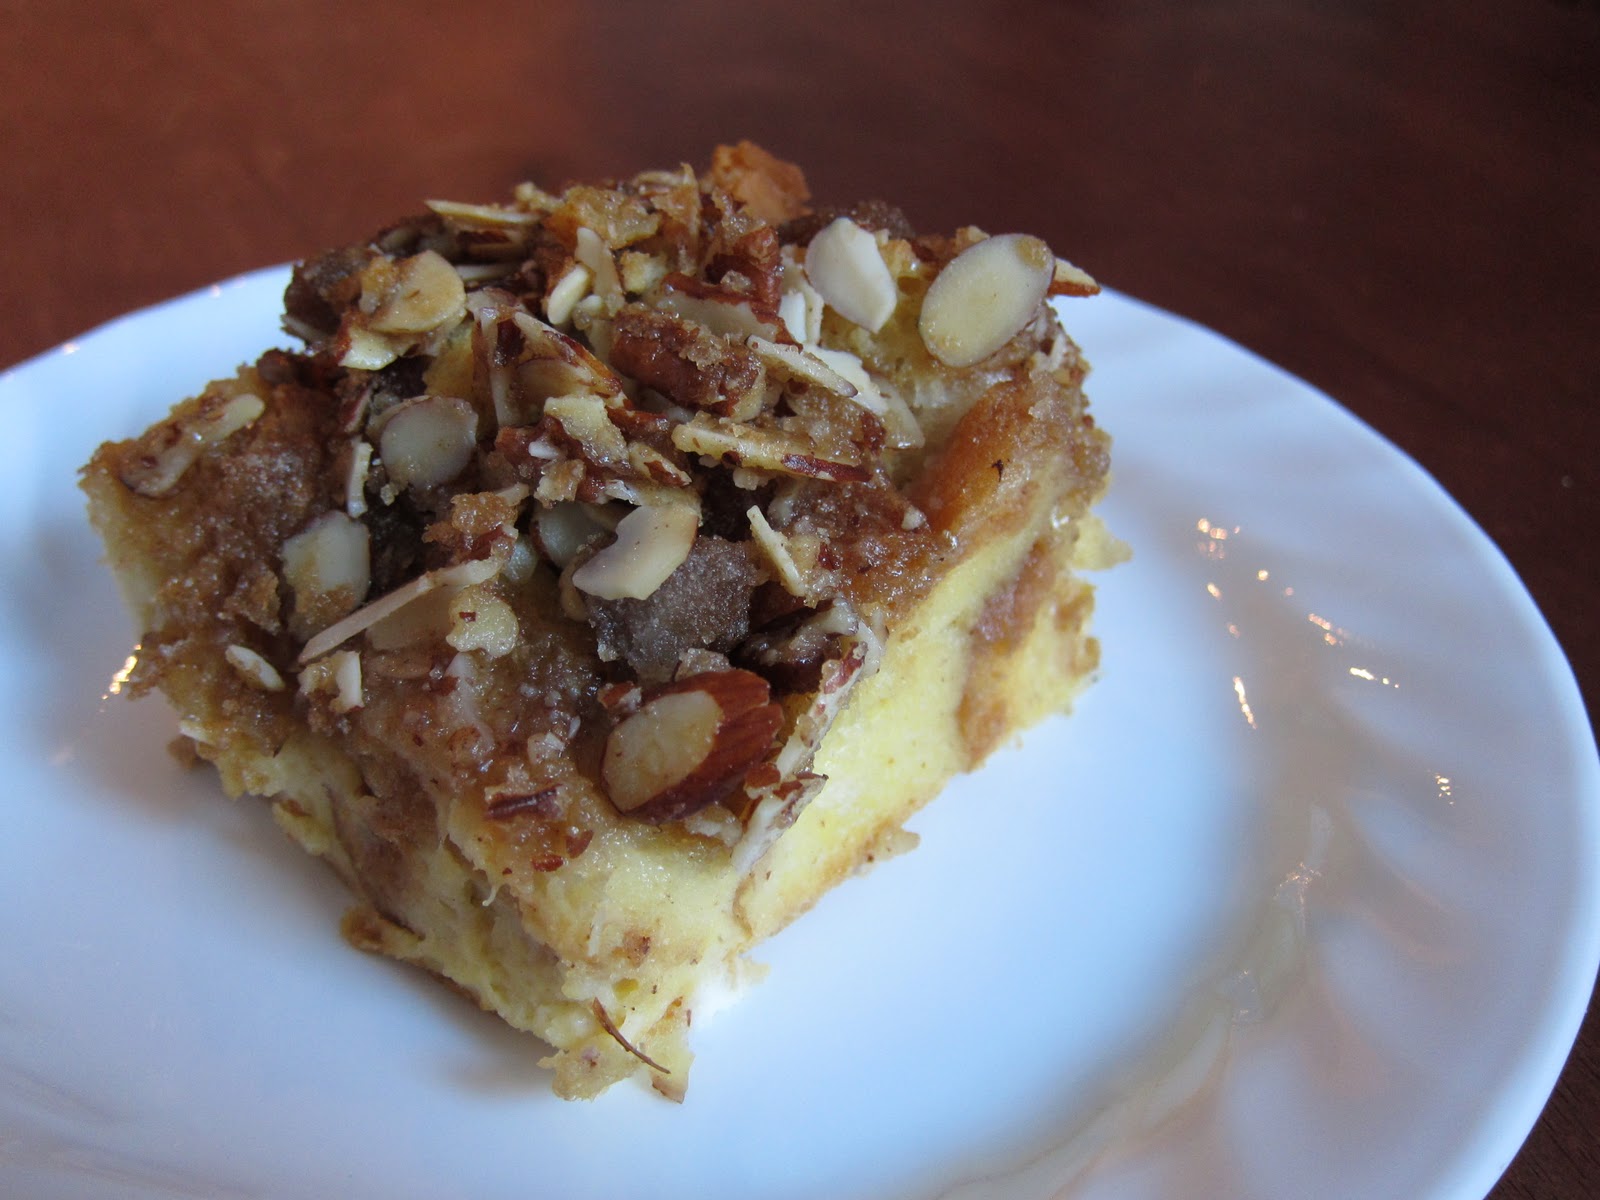
Easy Sunday Brunch: French Toast Casserole!

My husband and I had brunch with our friends Sarah and Jack a few weeks ago, and they introduced us to the fabulous idea of French toast casserole.  It has all the yumminess of French toast without all the work of frying the individual pieces of eggy toast.  

There were a bunch of French toast casserole recipes on the internet, but most of them sounded like glorified bread pudding.  As usual, Cook's Illustrated to the rescue!  This recipe has the bread soaked overnight in eggs, milk, and cream just like regular French toast, and then the topping makes the outside sweet and crunchy. No syrup necessary!

French Toast Casserole

Casserole
1 loaf (16-ounce) supermarket French or Italian bread , torn into 1-inch pieces
1 tablespoon unsalted butter , softened
8 large eggs
2 1/2 cups whole milk
1 1/2 cups heavy cream
1 tablespoon granulated sugar
2 teaspoons vanilla extract
1 teaspoon ground cinnamon
1 teaspoon ground nutmeg
Topping
8 tablespoons (1 stick) unsalted butter , softened
1 1/3 cups packed (9 1/3 ounces) light brown sugar
3 tablespoons light corn syrup
1 cup pecans, chopped coarse
1 cup slivered almonds

1.  Heat the oven to 325 degrees. Spread the bread out over 2 baking sheets and bake until dry and light golden brown, about 25 minutes, switching and rotating the baking sheets halfway through the baking time. Let the bread cool completely.

2. Coat a 13 by 9-inch baking dish with the butter and pack the dried bread into the dish. Whisk the eggs in a large bowl until combined and then whisk in the milk, cream, granulated sugar, vanilla, cinnamon, and nutmeg. Pour the egg mixture evenly over the bread and press on the bread lightly to submerge.

3. Make the topping by first stirring the butter, brown sugar, and corn syrup together until smooth, then add nuts.

4. TO STORE: Transfer the topping to an airtight container and wrap the dish tightly with plastic wrap. Refrigerate the topping and casserole separately for at least 8 hours or up to 24 hours.

5. TO SERVE: Adjust an oven rack to the middle position and heat the oven to 350 degrees. Unwrap the casserole and sprinkle the topping evenly over the top, breaking apart any large pieces with your fingers. Place the casserole on a rimmed baking sheet and bake until puffed and golden, about 1 hour. Serve immediately.

Yields: 6 to 8 servings
Active time: 15-20 minutes
Total time: 15-20 minutes of prep, overnight soak, one hour of baking

Monday, January 17, 2011

Dim Sum at Home: Shu Mai

First blog pic with our new camera!
We bought a new camera last night to replace the one that died after the soup incident.  My husband has been jabbering on about all the wonderful new features our Canon PowerShot S95 has. I'm sure the myriad of settings will come in useful eventually, but all I care about is that I don't have to take food pictures with my camera phone anymore!  Woohoo!

Anyway, I knew when I changed my blog name to incorporate dumplings as a nod to my Chinese heritage I would probably have to make some dumplings at some point.  So, this is my first stab at steamed dumplings (shu mai), which is probably one of the most popular dim sum dishes.

When I told my sister I was going to start with a Cook's Illustrated (CI) shu mai recipe, she balked.  "You're not going to use a Chinese recipe?" she asked.  Well, to be fair, I didn't have a family shu mai recipe handed down to me, and none of my current Chinese cookbooks had a recipe for shu mai.  Plus, I like that the CI team tries many different variations on a recipe to optimize flavor, and I trust that they would try to make their recipes taste as authentic as possible.

My husband and I agreed that the flavors were pretty much spot on in this CI version of shu mai. I only left out their recommendation of cilantro due to my husband's severe aversion to the herb and my feeling that it didn't quite belong in shu mai to begin with. I admire the other things the CI team did to tweak the recipe.  They used gelatin to try to recreate the succulent texture lard usually lends to the dish, and instead of MSG they used a combination of soy sauce, cooking wine, and rice vinegar to add flavor to the filling.  The pork ribs I got were pretty lean, and while my shu mai weren't dry, maybe next time I'll use some fattier pork for a juicier dumpling with better mouthfeel.

Shu Mai (Steamed Chinese Dumplings)
adapted from Cook's Illustrated September 2010

2 tablespoons soy sauce
1/2 teaspoon unflavored powdered gelatin
1 pound boneless country-style pork ribs, cut into 1-inch pieces
1/2 pound shrimp, peeled, tails removed and halved lengthwise
1/4 cup water chestnuts, chopped
3/4 ounces dried shitake mushroom caps (about 5 large or 10 small), soaked in hot water 30 minutes, squeezed dry, and cut into 1/4-inch dice
2 tablespoons cornstarch
1 tablespoon toasted sesame oil
1 tablespoon Chinese rice cooking wine (Shaoxing) or dry sherry
1 tablespoon rice vinegar
2 teaspoons sugar
2 teaspoons grated ginger
1/2 teaspoon table salt
1/2 teaspoon ground black pepper
1 package yellow, round wonton/dumpling skins
1/4 cup carrot , finely grated (optional)

1. Combine soy sauce and gelatin in small bowl. Set aside to allow gelatin to bloom, about 5 minutes.

2. Meanwhile, place half of pork in food processor and pulse until coarsely ground into approximate 1/8-inch pieces, about ten 1-second pulses; transfer to large bowl. Add shrimp and remaining pork to food processor and pulse until coarsely chopped into approximate ¼-inch pieces, about five 1-second pulses. Transfer to bowl with more finely ground pork. Stir in soy sauce mixture, water chestnuts, mushrooms, cornstarch, sesame oil, wine, vinegar, sugar, ginger, salt, and pepper.

3. Working with 6 rounds at a time, brush edges of each round lightly with water. Cover remaining rounds with wet paper towel to prevent drying out. Place heaping tablespoon of filling into center of each round. Pinch wrapper creating a fold on opposite sides of filling.  Rotate wrapper 1/2 turn and pinch wrapper again.  Make a total of 8 pinches and then squeeze sides against filling, shaping dumpling so that top of filling is exposed. Transfer to parchment-lined baking sheet, cover with damp kitchen towel, and repeat with remaining wrappers and filling. Top center of each dumpling with pinch of grated carrot, if using.

4. Cut piece of parchment paper slightly smaller than diameter of steamer basket and place in basket. Poke about 20 small holes in parchment and lightly coat with nonstick cooking spray. Place batches of dumplings on parchment liner, making sure they are not touching. Set steamer over simmering water and cook, covered, until no longer pink, 8 to 10 minutes. Serve immediately.
Yields 35 to 45 pieces
Active time: About 90 minutes (maybe I'll be faster next time)
Total time: About 100 minutes

Saturday, January 15, 2011

Not All Recipes Are Amazing

Thanks to my new year's resolution to do weekly menu planning, I've been cooking a lot more. I've really enjoyed it as cooking is a nice way to unwind after a hectic day at the hospital. While I putter around the kitchen and prep the ingredients, I talk with my husband about our days.

With menu planning has come inspiration to try new recipes, and I've been trying a lot of them. Some have been great, but there have been some misses in the kitchen over the last two weeks that I thought I would share.

1. Giant Cheesy Popovers.  There will never be a more beautiful picture of a something I baked but didn't love. They didn't taste bad, but I wasn't wowed by the flavor.  I will give two thumbs up to my new Chicago Metallic popover pan, though.  According to a Cook's Illustrated review, the open design maximizes heat transfer, which is crucial to high-rising popovers, and boy, did those popovers rise!!!  I was so excited that I tried to wake my husband saying, "Honey, my popovers are rising! Come look!"  He was not as excited as I was.  I'll keep looking for a popover recipe worthy of my new pan.

2. Cauliflower and Potato Curry. I thought cooking Indian food would be a great way to add vegetarian dishes to my repertoire, but this recipe was missing something.  Quite a few reviewers doubled or tripled the spices, so maybe I'll try that next time.

3. Banana Chocolate Chip Muffins.  This week's muffin snafu is not the recipe's fault as I've made it a few times before with great results.  I forgot about the baking powder!  I didn't realize it until the muffins had already been in the oven for five minutes.  I took the pan out of the oven, scooped the batter back into the bowl, added the baking powder, remixed, and refilled the baking cups, and then put them back in the oven.  The muffins didn't taste bad, but they were definitely denser than usual.

I'll definitely keep trying new recipes as it's fun for me.  However, this week my night classes start, which will put a dent into my cooking time.

Friday, January 14, 2011

Winter Melon Soup: The Soup That Killed a Camera

Winter melon soup before camera died =(
This food blog has had its first casualty.  While taking pictures of this soup, our camera fell into the bowl of soup.

I'm still getting used to using our mini tripod, and now I've learned my lesson about keeping an eye on electronics when close to bowls of liquids. I wonder if this has happened to any one else. A quick Google search says no.  The camera can actually still take blurry pictures but the LCD screen doesn't work anymore. *sigh*

It is a small consolation that the soup was delicious, really delicious.  I had never bought winter melon before or even seen one except in restaurant soups.  I was worried that I would get the wrong melon because there are no English labels at my local Chinese grocery and usually no one who speaks English.  Luckily, I read somewhere that winter melons are usually sold by the wedge since the whole melon can be up to 50 lbs, so I picked from the only melon wedges at the store.  Bingo! Maybe in the future I will try this vegetarian version but I thought the bits of ham and dried scallop really added different layers of flavor to the soup. Since the melon itself doesn't have much flavor by itself, it soaked up the broth flavors.

As reviewers on epicurious note, don't substitute fresh scallops for the dried scallops; it would be better to skip them if you don't have them.  Lucky for me, my mother-in-law brings gives us a bag when she visits, so I usually have some around.

I skipped the original recipe's soaking process for the dried scallops and just threw them in near the end. I was also too lazy to skim off the fat, but I probably would if company was coming.

Broth with chicken and veggies taken by camera phone
I made this soup a few days ago, and tonight I shredded the boiled chicken and added that plus some watercress to the leftover broth.  It was as yummy as the original, but the picture is not as clear since it was taken with my camera phone.  Hopefully we'll have a new camera in the next few weeks!

Winter Melon Soup
adapted from Gourmet Magazine via epicurious

For broth
1 (3- to 3 1/2-lb) whole chicken
1 bunch scallions, halved crosswise
2 oz ham steak
1 (1-inch) piece peeled fresh ginger, smashed
10 cups water
1 tablespoon salt

For soup
Dried scallops, handful
1 (2-lb) wedge winter melon
2 oz ham steak, sliced into thin matchsticks
3 scallions, thinly sliced

1. Make broth: Rinse chicken inside and out, then stuff cavity with scallions, ham, and ginger. Bring water with chicken and salt to a boil in a deep 7- to 8-quart stockpot or pasta pot, then reduce heat and cook at a bare simmer, uncovered, skimming off froth occasionally, 1 hour. Remove and discard chicken. Let stand 5 minutes. Skim off fat.

2. Cut off and discard rind from winter melon. Remove and discard seeds, then cut melon into 1/3-inch cubes (about 5 cups). Add melon and dried scallops to broth and gently simmer, uncovered, until melon is transparent, 20 to 30 minutes.

3. Stir in ham, scallions, and salt to taste just before serving.